
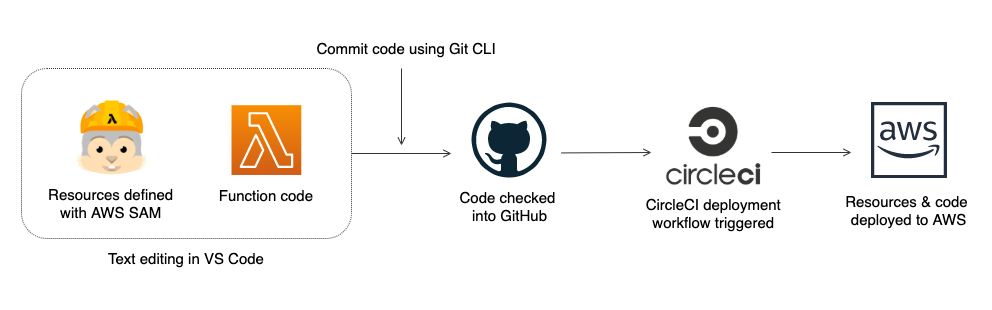
For deploying my applications, I have a CI/CD pipeline that uses the AWS Serverless Application Model (SAM), GitHub, and CircleCI. In this post I'll show you how to set it up. If you're not familiar with CI/CD, here's a post that introduces it well.
Many people (myself included) get started with serverless by using the AWS console. While it's helpful to start, building directly in the console can get tricky as you run into issues like keeping track of your Lambda function code edits or making manual, repetitive configuration changes to resources.
In order to build more complex applications and keep your sanity, a CI/CD pipeline will be a big help. A CI/CD pipeline will take you out of the console and allow you to store and update function code, configure resources, and deploy entire applications from right within your text editor. It is as magical as it sounds.
Building a CI/CD pipeline may feel like a lot of components to bring together at first, but it becomes second nature once you've set up a project and gotten comfortable with it.
Concepts & tools
Let's first introduce the concepts and tools we'll be working with. These are the tools that I use, but there's plenty of other great tools out there that you can swap in.
Text editor - Where you write your code, i.e. Visual Studio (VS) Code.
Code repository - Where you store and version control your code, i.e. GitHub.
Distributed version-control system - I.e., Git. We'll use Git to interact with GitHub repos from our CLI.
Deployment framework - What you use to write your infrastructure as code, i.e. AWS Serverless Application Model (SAM). Infrastructure as code (IaC) is awesome. Previously you might have been manually creating resources in the AWS console, which is a good way to explore new things but quickly starts to feel time consuming and easy to make mistakes. With IaC, you write and save your application infrastructure and configuration settings as a template file. This way you get the same results every time you deploy your application, and you can easily create or delete the entire application (or 'stack').
CI/CD platform - The tool that builds and deploys your application, i.e. CircleCI.
Cloud computing provider - Where you deploy your infrastructure and code, i.e. Amazon Web Services (AWS).
Our example project for this tutorial is an application consisting of a Lambda function that sends messages to an SNS topic. Check it out here: serverless-cicd-example
Let's get started!
Jump to:
- Set up your development environment
- Fork my example repo and clone to your computer
- Create a CircleCI account and set up a new project
- Give CircleCI AWS permissions
- Review SAM template and function code
- Create an S3 bucket for your deployment package
- Managing secrets in your CI/CD pipeline
- Deploy & test out your application
1. Set up your development environment
If you haven't already, download VS Code.
Check if you git installed by running git --version in your CLI. If you don't have Git installed, download it here.
Next, set up a GitHub account if you don't have one already. To save your computer's credentials to GitHub, follow this guide to generate an SSH key and save it to GitHub.
Download GitHub Desktop.
2. Fork my example repo and clone to your computer
Our next step is to create a GitHub repo for our project. I've created an example project for this tutorial that you can fork (click 'Fork' from the example project). Forking my repo will create an identical repo in your GitHub account.
Then, go to your new repo and click 'Clone or download' -> 'Open in Desktop'. Once the repo is cloned to your computer, from GitHub Desktop click 'Repository' -> 'Open in Visual Studio Code'.
3. Create a CircleCI account and set up a new project
Now let's set up a CircleCI account. Select 'sign up with GitHub' to automatically connect your CircleCI and GitHub accounts.
Once you're signed in to CircleCI, it's time to set up your repo as a project.
Since CircleCI is connected to your GitHub account, it will automatically list all of your repos. Select the 'serverless-cicd-example' repo that you forked.
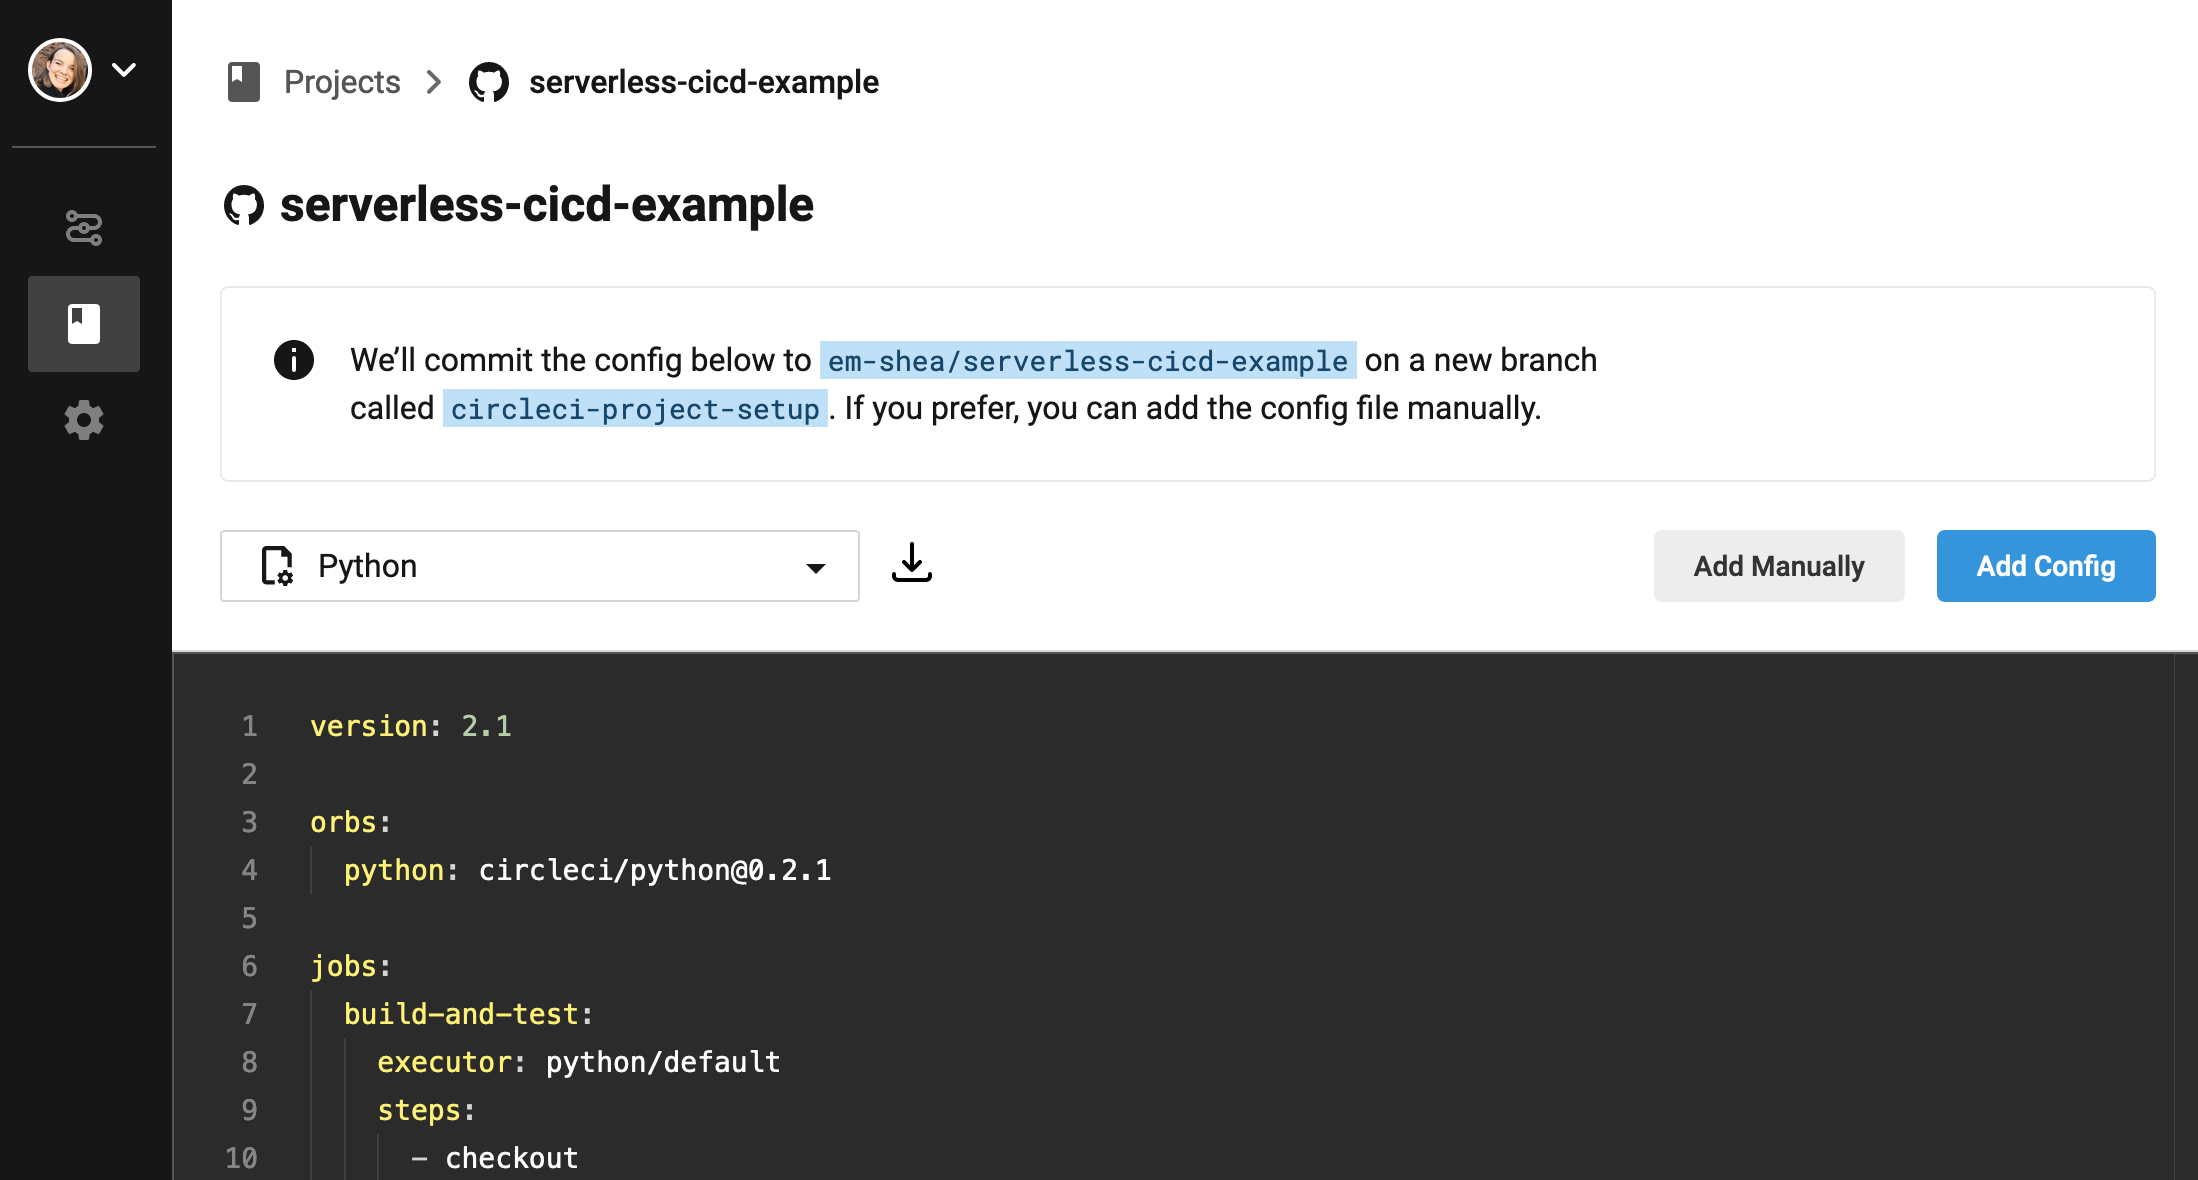
The new project setup workflow asks you to create a .circleci folder with config.yml file. This file is where you write out the steps and CLI commands that you want CircleCI to run when it builds and deploys your code. I've already included a .circleci folder in the example project, so you can select 'Add Manually' -> 'Start Building'.
CircleCI will try to run an initial build, but since we're not finished with our setup, it will fail this time. No problem!
4. Give CircleCI AWS permissions
We need to give CircleCI AWS IAM permissions in order for it to make calls to AWS and create our infrastructure. To do this, sign into the AWS console, go to IAM, and select Users. Click 'Add user'. Name the user 'circleci-serverless-example' and select 'Programmatic access'.
Now we give the new user permissions.
The right way: Best practice is to grant the user the bare minimum IAM permissions they require to complete the given task. To give you an idea of what that looks like, I've created an IAM policy that limits the users permissions to the resources our app needs to deploy (CloudFormation, IAM, Lambda, SNS, and S3). Select 'Attach existing policies directly' -> 'Create policy' -> 'JSON' and then copy and paste this IAM policy. Be sure to swap out 'your-bucket-name' with the same S3 bucket name you use in Step 6.
For a production application, you would want to make these permissions even more restrictive. I'm still looking for good resources on tightening these policies up further, so please reach out if you have any.

The easy way: Select 'Attach existing policies directly' and then check 'AdministratorAccess'. Admin access is the broadest IAM permissions you can give to a user, which is helpful when you're trying out new things and don't want to run into permissions errors but not secure enough for a production application.
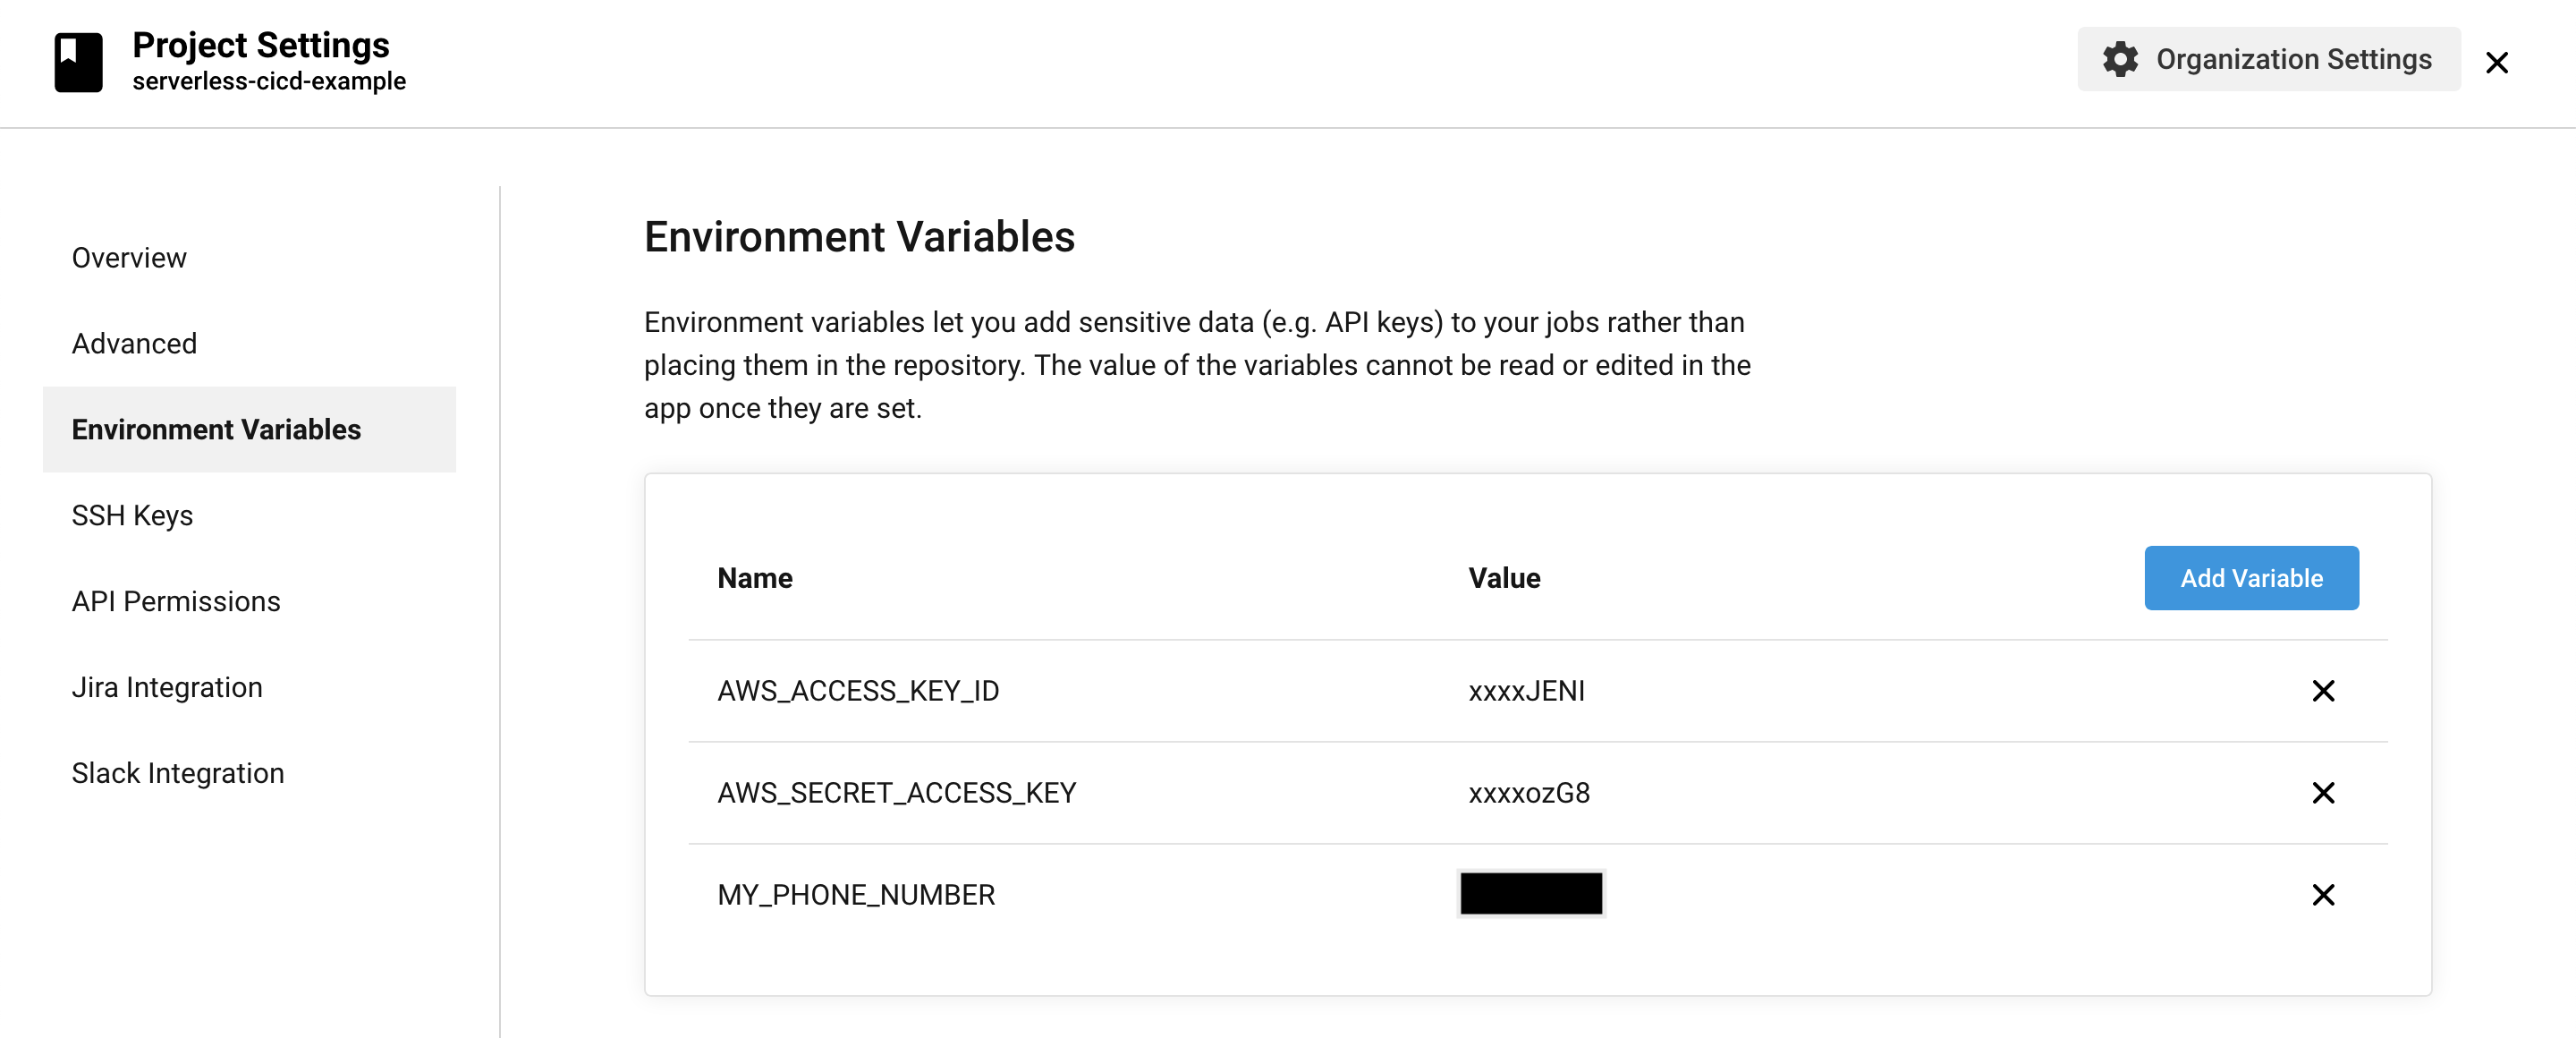
Once you've created the user, you'll see an access key ID and a secret access key. We'll store these in the CircleCI project's environment variables so CircleCI can deploy for us.
In CircleCI, navigate to your project and click 'Project Settings' -> 'Environment Variables.' Add both your access key ID (name: 'AWS_ACCESS_KEY_ID') and secret access key (name: 'AWS_SECRET_ACCESS_KEY'), like so:

When copy/pasting from the AWS IAM console, watch out for a single blank space getting added in front of your AWS access key ID.
5. Review SAM template and function code
At this point, you would write your SAM template configuration file and your Lambda function code. I've already included these files in the example project. Open up template.yaml to see the SAM template and send_text_function.py to see the example function code.
6. Create an S3 bucket for your deployment package
Before we deploy, we'll need to create an S3 bucket that SAM will upload our deployment package (i.e., our template file and function code) to.
You can manually create the bucket in the console, or run this command (if you have the AWS CLI installed). S3 bucket names need to be universally unique, so be sure to make a change to 'serverless-cicd-example' (like adding today's date).
aws s3api create-bucket --bucket serverless-cicd-example --region us-east-1
In your .circleci/config.yaml file, update the S3 bucket name in the sam deploy command to the bucket name you just created (and your IAM policy for CircleCI if you used the more restrictive IAM policy).
7. Managing secrets in your CI/CD pipeline
Lastly, you often need to manage 'secrets', or variables that you don't want to upload to your code repository for the world to see, in your CI/CD pipeline. In my example application, we want our function to send a text message to us, so we need to create an SNS subscription using our phone number.
To do this, save another environment variable in CircleCI called 'MY_PHONE_NUMBER' (be sure to include the country code, ex: a U.S. phone number would be 15555555).
There's no need to make any other changes, as this variable will get passed to our template.yaml and function code. Within the sam deploy command in the config.yaml file, you can see that we include this environment variable as a parameter override.
--parameter-overrides MyPhoneNumber=$MY_PHONE_NUMBER
In our SAM template, we register this variable as a parameter and then pass it to our Lambda function as an environment variable and to our SNS topic as a subscription endpoint. Finally, within our function code we use the secret like this:
phone_number = os.environ['MY_PHONE_NUMBER']
Don't stress if secrets feel a bit complicated. Use this example as a reference for when you do need to pass secrets into your CI/CD pipeline.
8. Deploy & test out your application
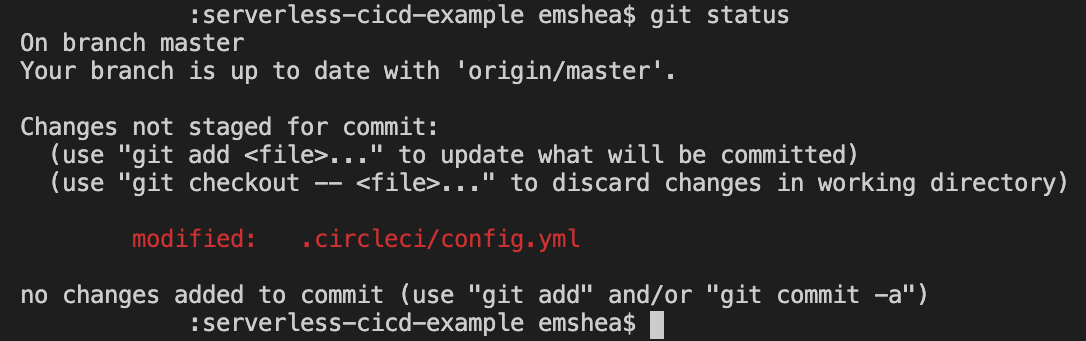
We're ready to push our code! Within VS Code with the example project open, open a new terminal. Run git status to confirm that you're in the right directory and check which files you've modified.
Next, run git add . to add your changes and prepare to commit them.
Run git commit -m "change S3 bucket name" to commit changes and add a description of your changes.
Run git push to push your changes to GitHub.
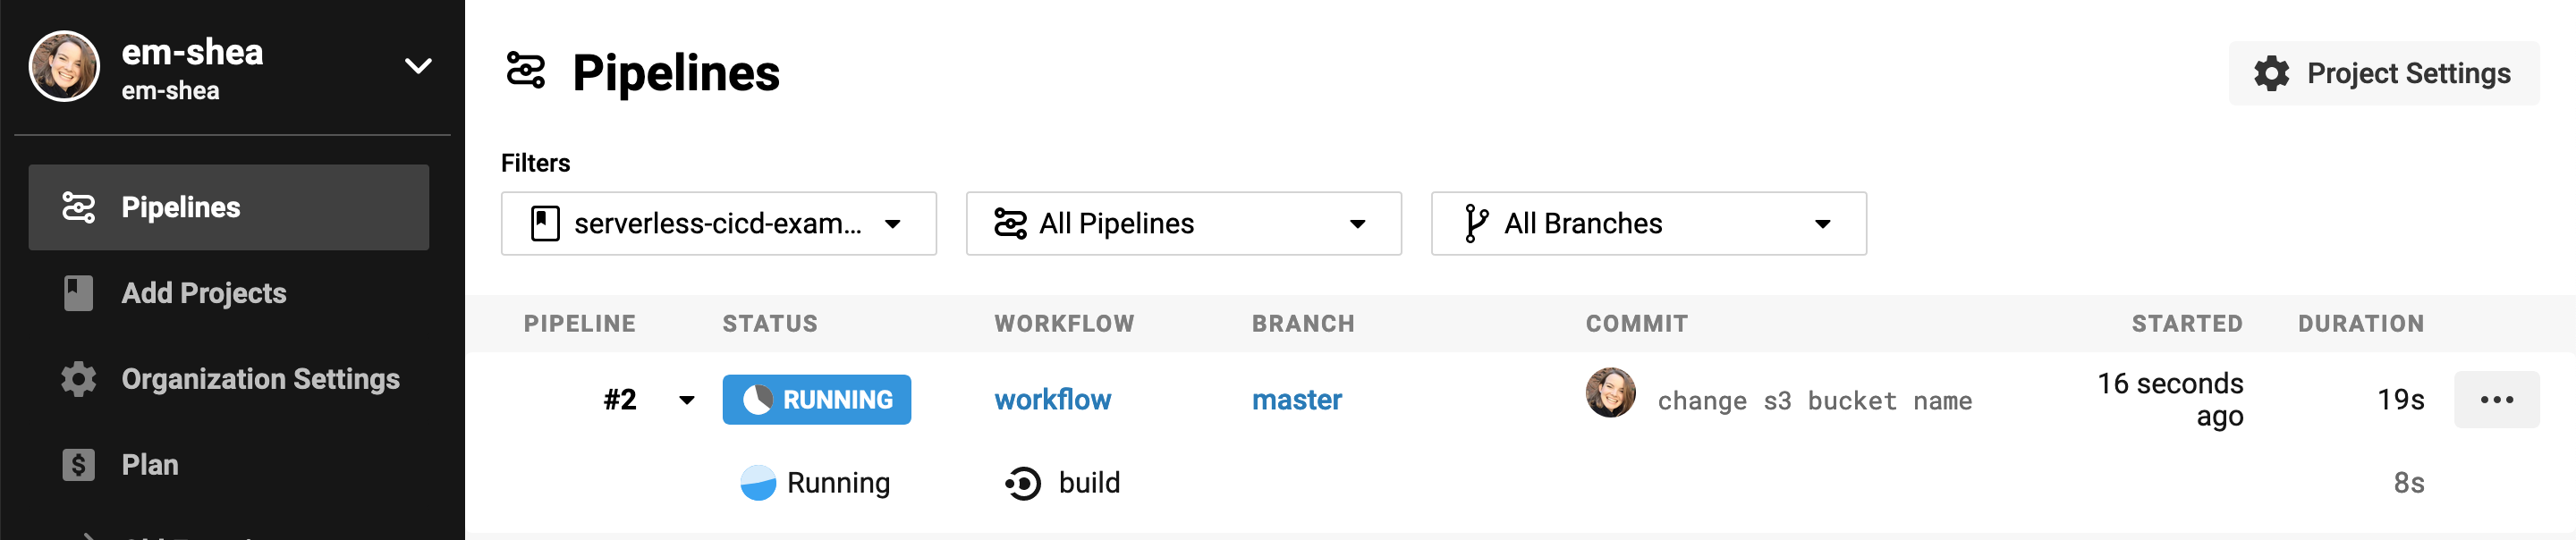
Once the changes hit GitHub, you should see a new build and deployment running within CircleCI. You can also watch the resources being created if you click on your stack in the CloudFormation console.
If your first deployment of a Cloudformation stack fails, you will need to manually delete the stack in the CloudFormation console in order to try again. Once you have had one successful deployment, the CloudFormation stack is then able to roll back failed deployments on it's own, no manual deletes required.
If your CircleCI deployment was successful, you can test your Lambda function in the console or using the AWS CLI:
aws lambda invoke --function-name CICDSendTextFunction --payload '{}' response.json --region us-east-1
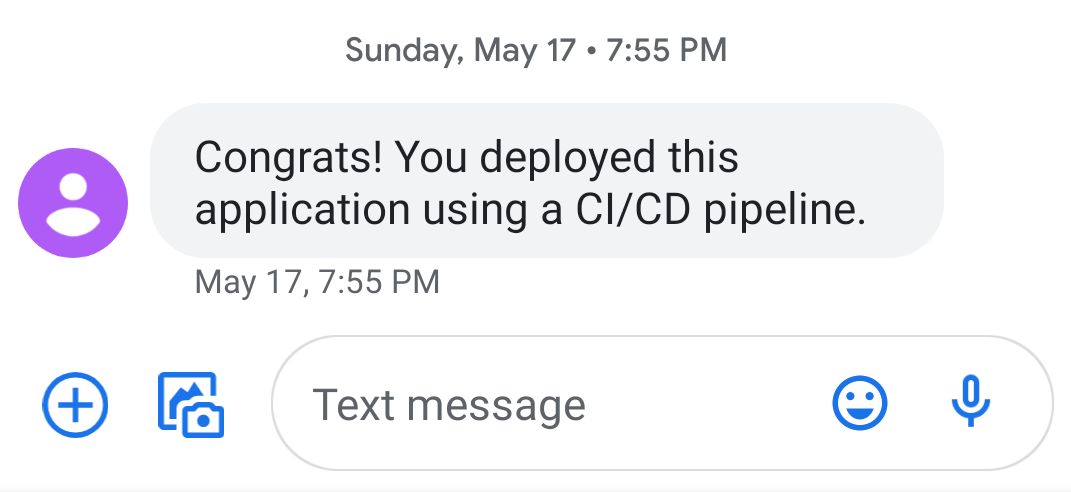
You should receive a text message congratulating you on your new CI/CD pipeline 🎉
There's a lot of complexity involved in getting all of these tools to communicate with one another. Stick with it and figure out the CI/CD toolchain that works well for you. Having a CI/CD pipeline makes a world of difference in the ease and speed of your development experience.
There's a few more advanced CI/CD topics that I'd like to cover in future blog posts, like creating staging and main branches in GitHub for your dev and prod environments, adding testing to your pipeline, and tightening your IAM permissions for CircleCI.
For now, I hope this post helps you to get started with CI/CD for serverless.
🌻